Building my pfsense router
Kevin Wong /
May 6, 2017
Preface
As I migrate my blog from Squarespace, I reflect that I've written this blog post back when I was a junior in high school. If you can bare with a 17 year old's writing, I hope you enjoy this post.
Background
I needed a new router for my home. I was previously using Google WiFi which did the job but I felt that it was limited for a home that has over 50 devices. Generally, I believe Google WiFi is great for people who just want a simple and easy wi-fi solution. However, as a power user, you will need to build your own router.
I currently have over 50 devices on my network and Google WiFi is super limited to controlling and managing these devices.
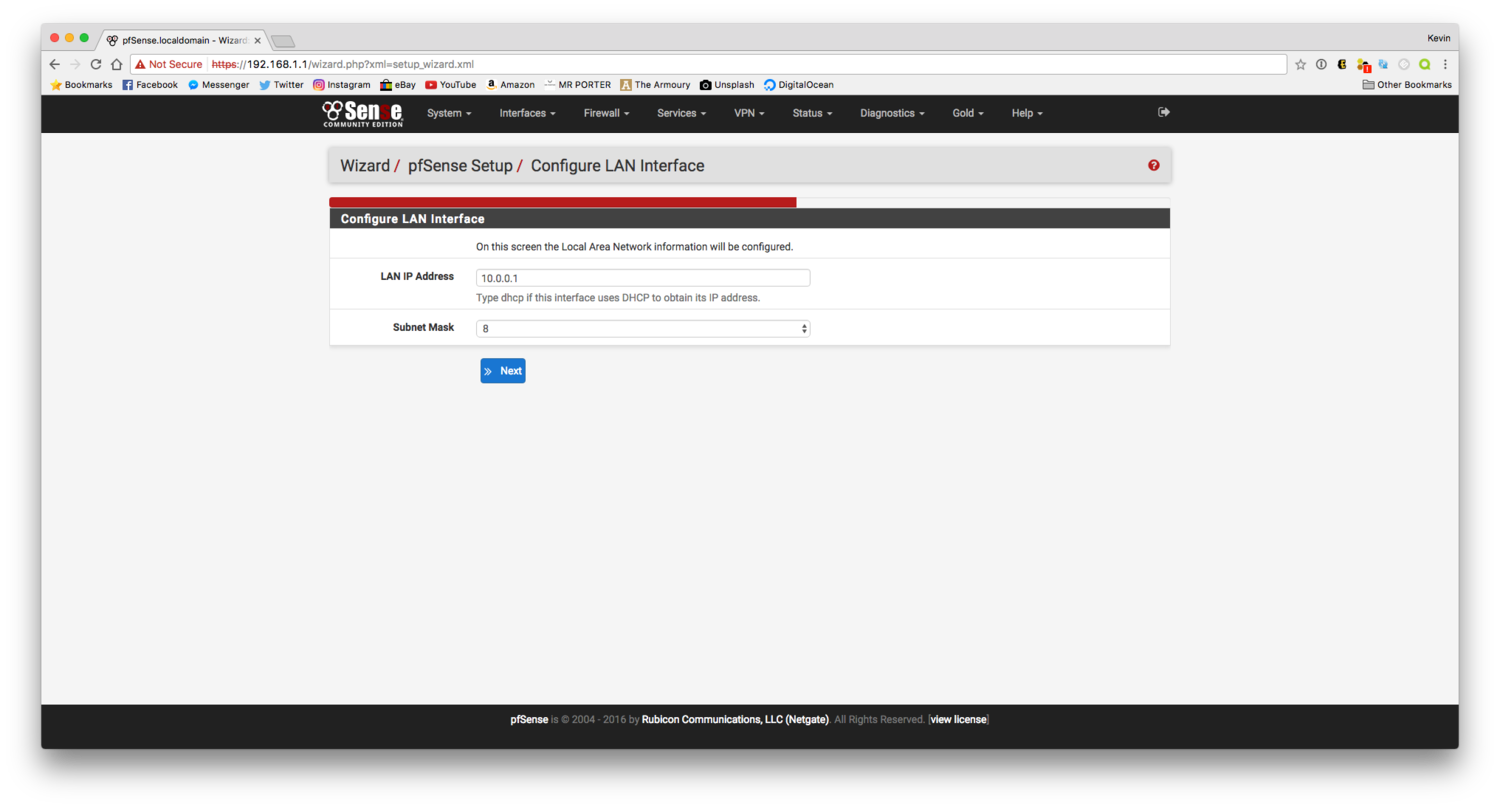
The default IP range is 192.168.86.XXX /24 and you cannot change this to a 10.X.X.X /8 or even to a simple 192.168.1.XXX /24 range. UPDATE: Google finally allows you to change your IP Range in the Google WiFi app!
Furthermore, there are major problems with how Google WiFi is a fully cloud-based solution and how a simple mistake on Google's end can destroy your entire network configuration.
Why I wanted a new router?
- Future Smart Home Capability
- Control & Customization
- Static Caching
- Increased Speed
In my opinion, Google WiFi has decent hardware compared to competitors. However, I have over 50 devices and these packets need to be moved. Building a router seemed to be the best option and I wanted to build something that was powerful but small and efficient.
The Hardware
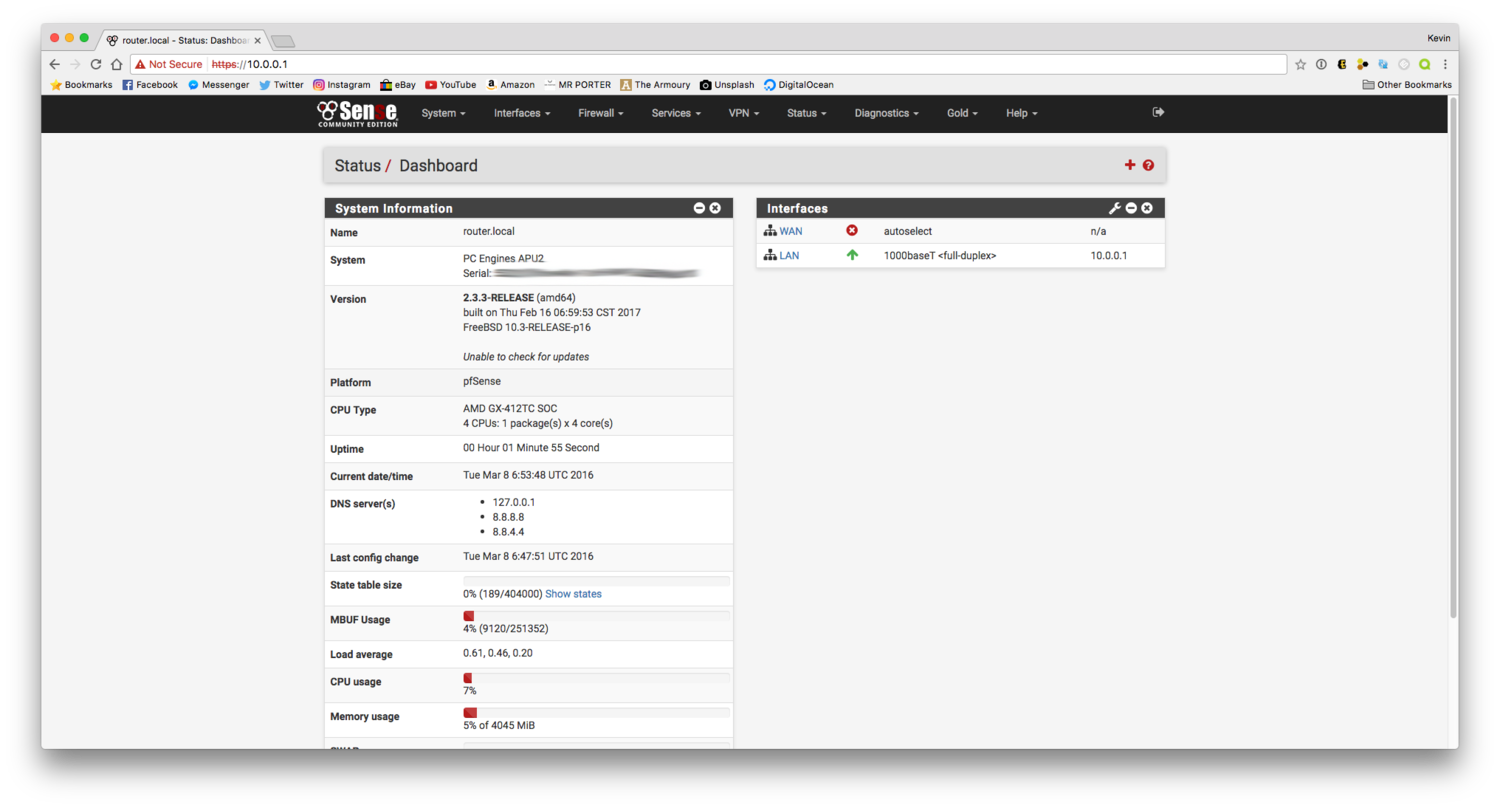
I decided to go with the PCEngine's APU2 board which is based on an AMD quad-core APU.

I purchased the APU2C4 board directly from PCEngines. It features 4GB of RAM, 3 Intel NICs, 2 USB 3.0 ports, 3 mSATA slots. With my purchase, I decided to add a black enclosure and US power adapter.
On Amazon, I decided to go with an ADATA SP310 128GB SSD. It features MLC NAND which is great and it was only $69. It has plenty of storage for the pfsense operating system and was a bit overkill but I planned on using the extra storage space for Squid Caching.
Building the Router
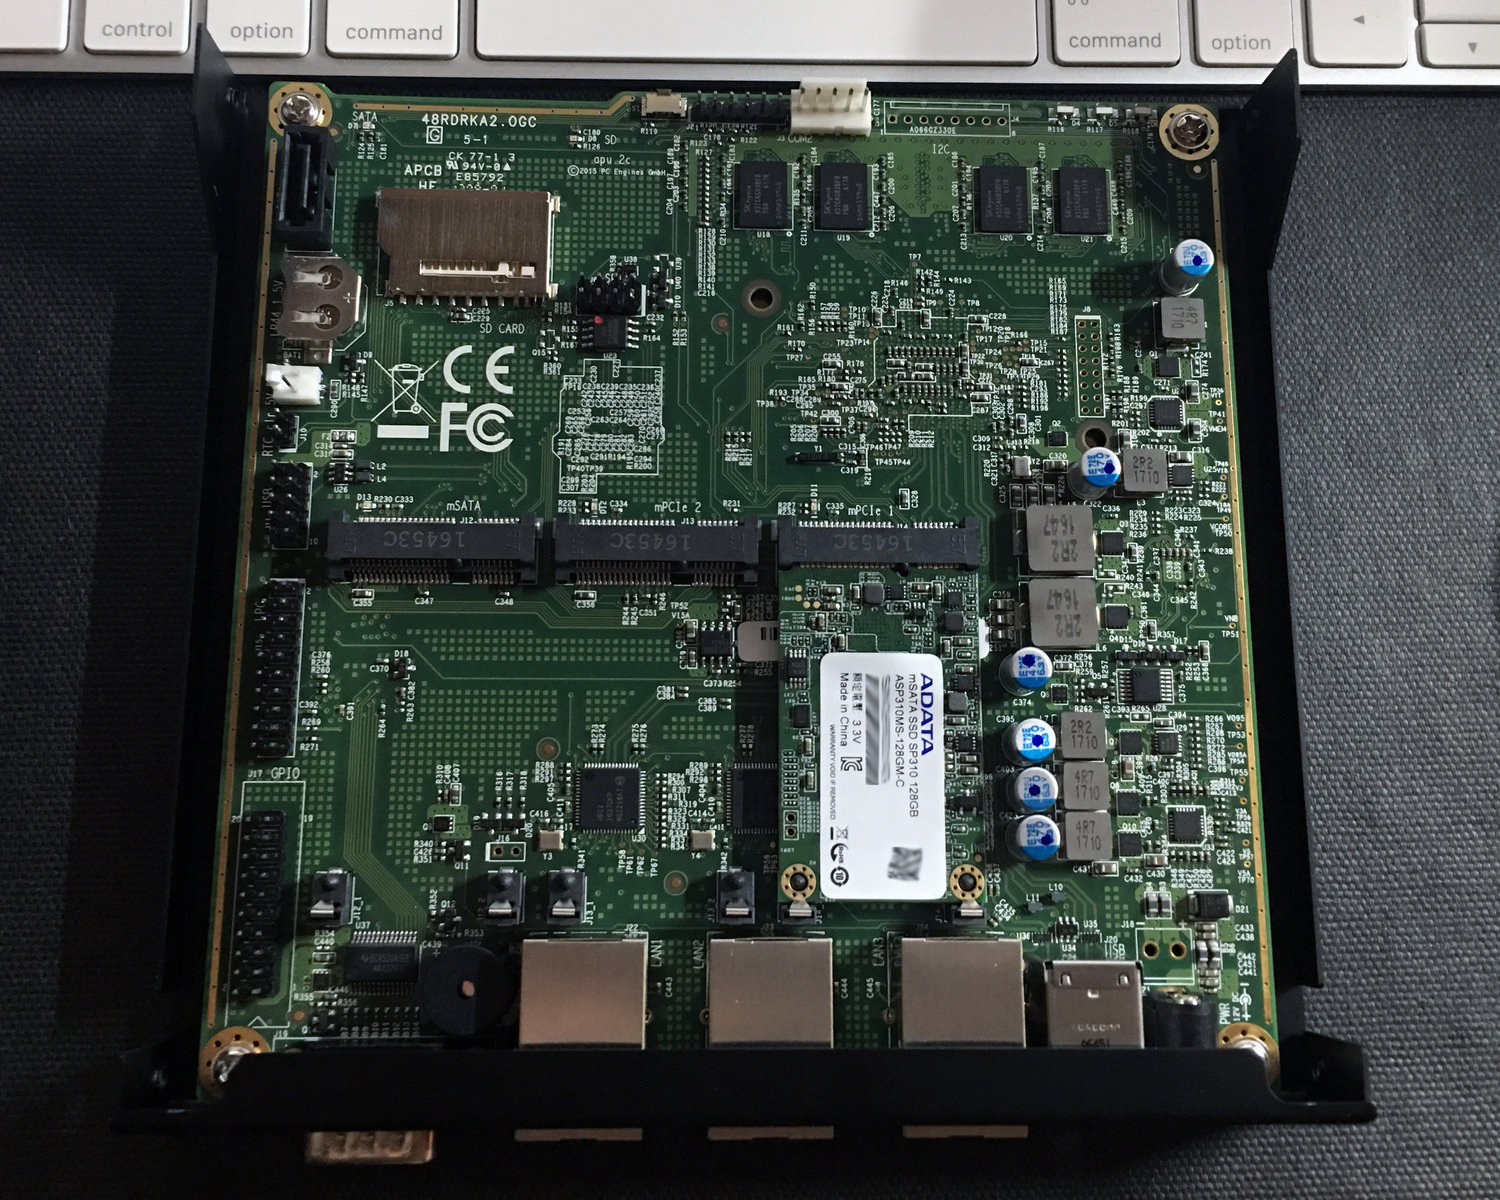
The build was as simple as installing the heatsink, screwing everything together, and inserting the SSD. This part only took me about 15 minutes to put together and everything came together nicely.
However, this is where we hit our first roadblock. When I purchased this board, I wasn't thinking about the console port. For some reason, I kept thinking that this board had a VGA port and it would be as simple as creating a USB Installer using Terminal and installing using a monitor. I ended up ordering a USB to DB9 cable on Amazon.
The Install

I installed the latest version of the pfsense_amd64_usbmemstick_console image. I used an application called "Serial" by Decisive Tactics to connect to my APU2 box. This was the hardest part of the installation as many of the console apps work and don't work with the APU2. PuTTy works best with Windows!
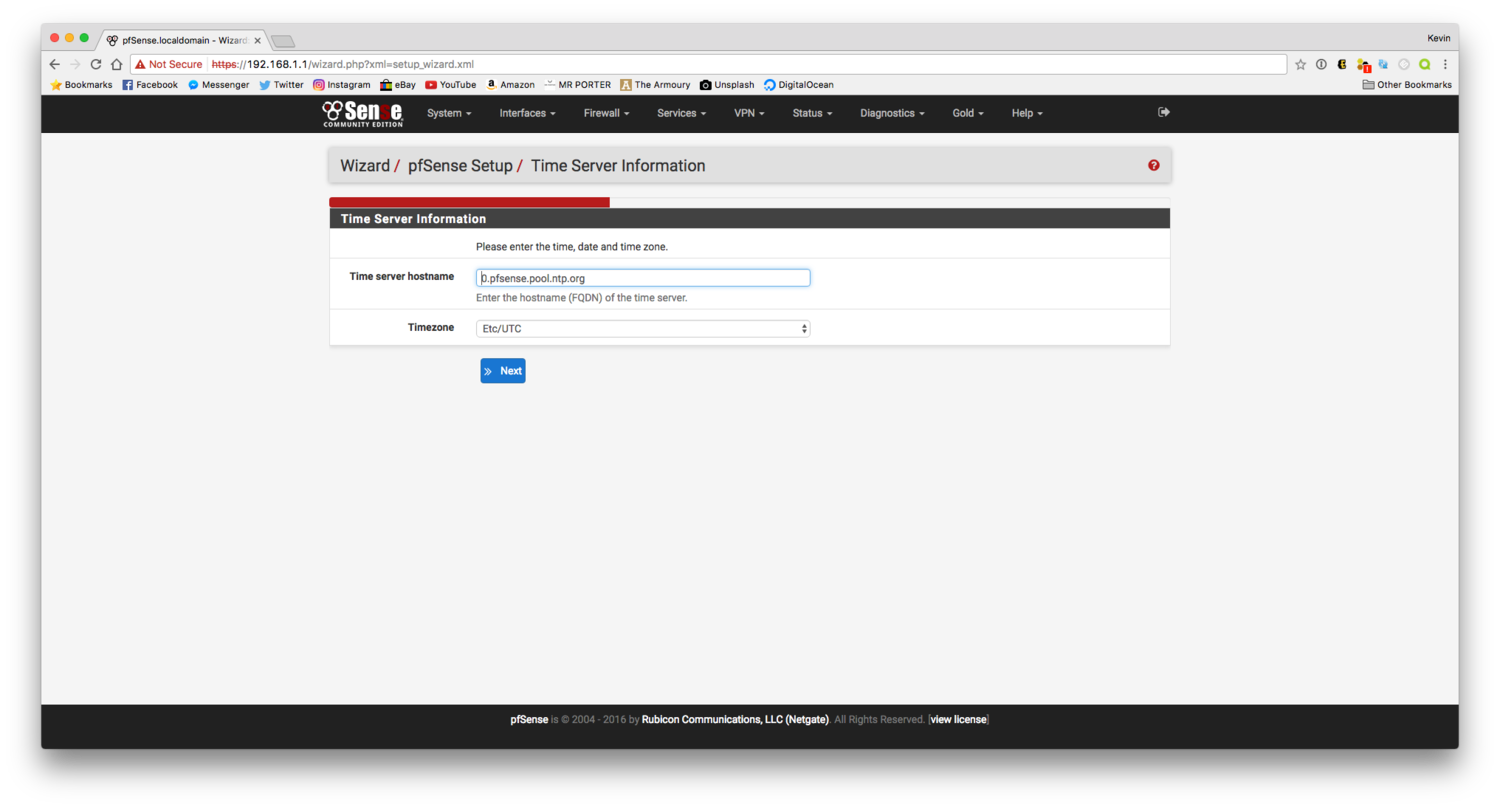
After you're connected to the console, it's as simple as booting off the USB and going through the default settings of installing pfsense. It will automatically configure the ports as WAN, LAN, and OPT1 for all APU2 boards.
Configuring the Router


The Aftermath
My setup is as follows:
Motorola Surfboard (Modem) ➡️ pfsense Appliance (Router) ➡️ Google WiFi (Access Point)
I have Squid Caching acting as a cache server for iOS software and app updates, Mac software and app updates, Windows updates, and a basic HTTP cache. You can intercept HTTPS traffic by installing your own security certificate but I would do this at your own risk. I have a few other basic security packages but I haven't done anything amazing with pfsense, yet.
UPDATE: Enterprise Networking at home is amazing. I watch iOS app updates download in seconds.